How to brew yerba mate in a mug? A simple way to make a flavourful infusion without a gourd
Yerba mate is commonly associated with the traditional gourd and bombilla – and it makes sense, as this is the way it is typically enjoyed in South American countries. In reality, however, you don’t need any traditional accessories at all to enjoy the full flavour and properties of yerba mate. If you’re just starting out and wondering how to brew yerba mate in a mug, or whether it even makes sense – don’t worry, you’re in exactly the right place!
In this guide, we’ll show you that brewing yerba mate in a mug is a simple, effective and fully valid alternative. You’ll learn how much yerba mate to put in a mug, what water temperature works best, and how to drink yerba mate to make the infusion flavourful, aromatic and naturally energising. We’ll also share a few scientific curiosities about brewing – because even an ordinary mug can bring out a lot from these leaves.
Summary:
- Yerba mate in a mug – is it possible?
- What do you need to brew yerba mate in a mug?
- How much yerba mate to put in a mug?
- How to brew yerba mate in a mug – step by step
- How to drink yerba mate from a mug?
- Most common mistakes when brewing yerba mate in a mug
Yerba mate in a mug – is it possible?
Absolutely. Brewing yerba mate in a mug is one of the simplest methods and a great way to discover the flavour of yerba mate without investing in additional accessories. A mug doesn’t negatively affect the aroma or the properties of the infusion – what truly matters is the water temperature and brewing time.
It’s worth knowing that most bioactive compounds contained in Ilex paraguariensis leaves (including polyphenols, caffeine and phenolic acids) extract regardless of the vessel used. Numerous scientific reviews focused on plants of the genus Ilex confirm this – including an extensive publication in Nutrients (2018). Researchers emphasise that the final composition of the infusion depends primarily on the temperature of the water and the duration of contact with the leaves – not on whether you use a gourd or a simple ceramic mug.
💡 Scientific fact: A 2018 review study found that brewing conditions – especially temperature and time – have the greatest impact on the levels of caffeine, polyphenols and antioxidants in a yerba mate infusion. This means you can achieve the same beneficial properties in an ordinary mug as in a traditional gourd – provided you use the right water temperature.
💬 Source: R. Gan et al., Health Benefits of Bioactive Compounds from the Genus Ilex, a Source of Traditional Caffeinated Beverages, Nutrients, 2018.
So if you’re wondering whether yerba mate in a mug is a good idea – it absolutely is! It’s quick, convenient, and perfect for beginners who want to start without buying a bombilla or a gourd.
If you would also like to explore traditional brewing techniques and learn how to brew yerba mate the classic way, take a look at our guide: How to brew yerba mate properly?
What do you need to brew yerba mate in a mug?
To prepare a good yerba mate in a mug, you don’t need many accessories. This is exactly what makes this method perfect for beginners – just a few basic items that you most likely already have at home. If you’re just starting out and want to check how to brew yerba mate in the simplest possible way, below you’ll find a complete list of what you’ll need.
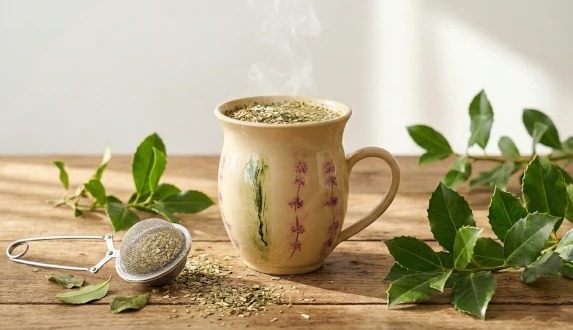
- ✔️ Mug – preferably ceramic or glass, with a capacity of 250-300 ml. It should be heat-resistant.
- ✔️ Spoon – to measure out your portion of yerba mate.
- ✔️ Water at the right temperature – ideally 70-80°C. Water that is too hot may extract unpleasant bitterness.
- ✔️ Infuser or strainer – optional, but helpful if you want to avoid loose leaves floating in your drink.
You can also brew yerba mate without any accessories – simply put the loose leaves directly into the mug, pour water over them, and wait a few minutes for the leaves to settle at the bottom. However, if convenience matters to you, an infuser can make things much easier.
Which type of yerba mate to choose at the beginning?
If this is your first attempt and you’re only learning how to brew yerba mate in practice, it’s worth choosing gentler blends. Lighter yerba mate varieties contain less dust and have a milder taste, which works very well in a mug. Good options include:
- classic yerba mate, especially despalada or suave – gentler, less bitter, perfect for beginners,
- fruit blends – milder and more aromatic,
- herbal mixes – refreshing and light.
You already have your mug, water and the right yerba mate? Great – now we can move on to the next step: how much yerba mate to put in a mug to achieve the perfect strength. Keep reading!
How much yerba mate to put in a mug?
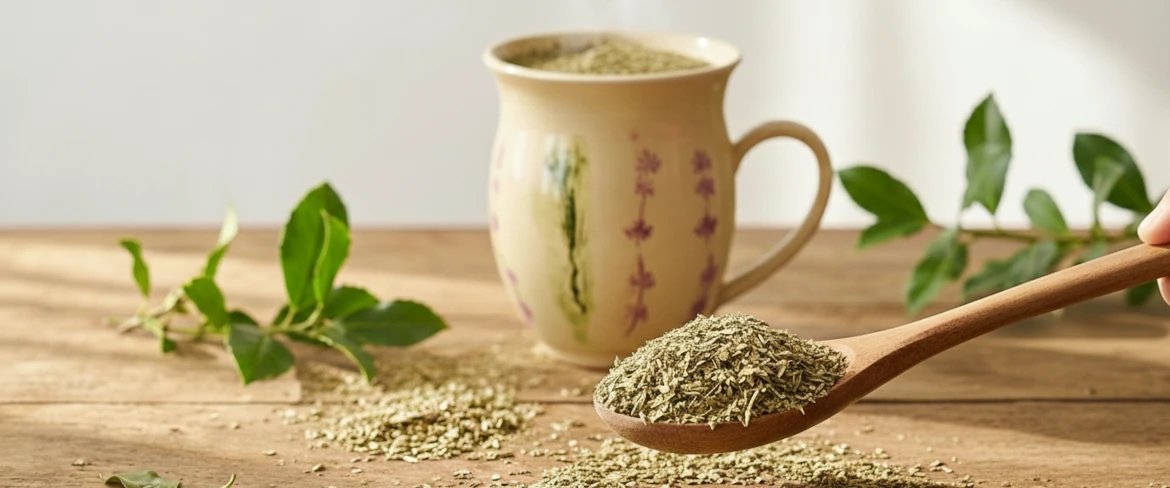
This is one of the most common questions asked by beginners who want to know how to brew yerba mate in a mug without making it too bitter. The simplest rule says: for a standard mug of around 250-300 ml, you typically use 2 tablespoons of yerba mate (about 10-12 g). This portion produces a medium-strength infusion – flavourful but still pleasant and accessible for newcomers.
If you prefer a milder brew, start with 1 tablespoon and increase the amount gradually. If you like a stronger energising effect and a deeper aroma, you can add more – but do so with moderation. Too much yerba mate may result in an overpowering bitterness. You control the strength of the infusion by adjusting the ratio of leaves to water and the brewing time.
Now that you know how much yerba mate to put in a mug, let’s move on to the practical steps – how to brew yerba mate from start to finish.
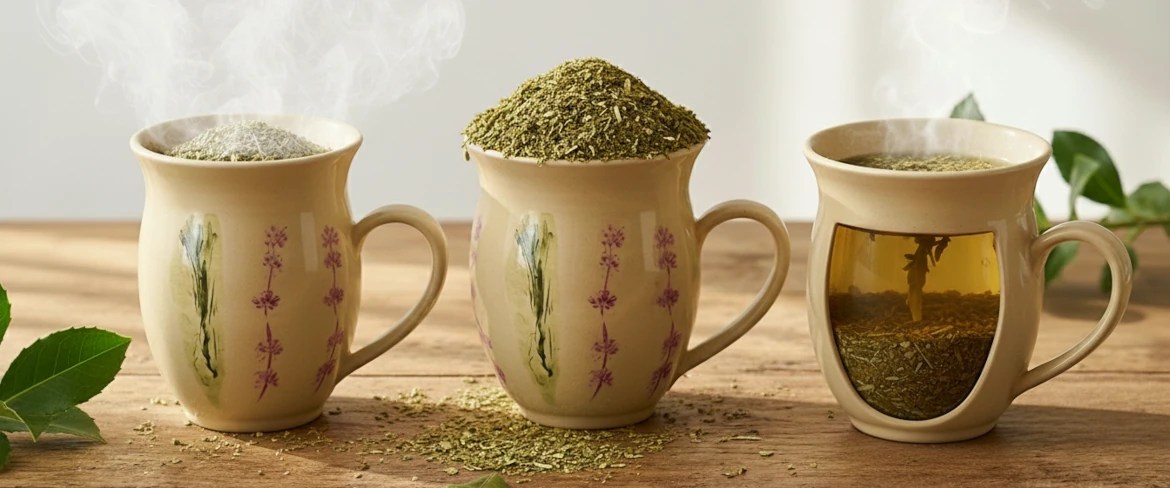
How to brew yerba mate in a mug – step by step
Time to move on to the practical part. The steps below explain how to brew yerba mate in a mug so that the infusion is aromatic, well-balanced and naturally energising – even if you don’t have a gourd or a bombilla. It’s a simple way to enjoy yerba mate in any situation.
1️⃣ Step 1 – Add the right amount of yerba mate
Measure out around 2 tablespoons of yerba mate (which is roughly 10-12 g) for a mug with a capacity of 250-300 ml. This ratio produces a medium-strength infusion – ideal for beginners. If you want a milder taste, start with one tablespoon; if you prefer something stronger, add a little more, but in moderation. Too much yerba mate can make the infusion very bitter and not pleasant to drink, especially in a mug.
You can put the loose leaves directly into the mug or place them in an infuser or a metal strainer – a good choice if you want a clear infusion without floating leaves. After adding yerba mate, try to spread it evenly on the bottom (or inside the infuser) so it brews evenly.
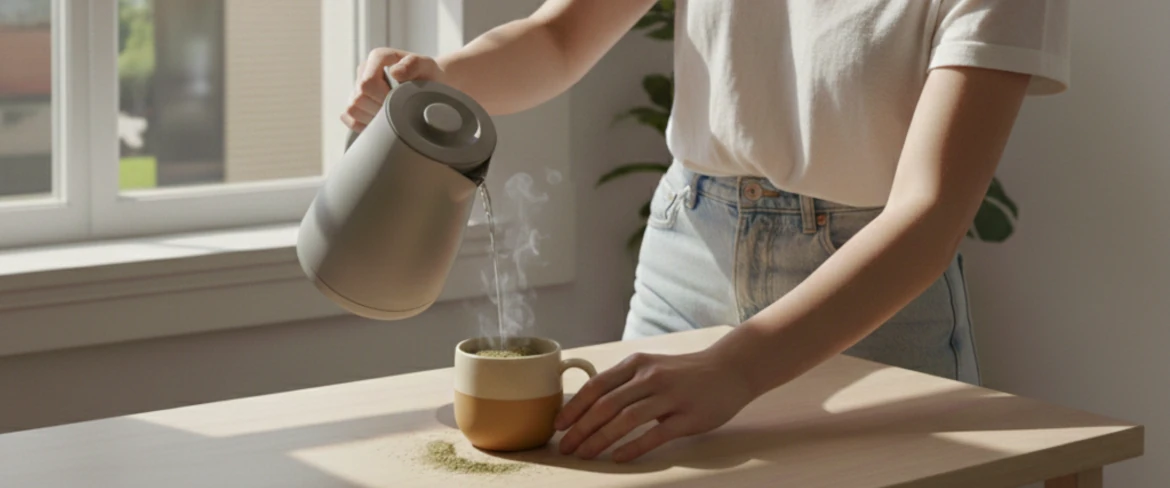
2️⃣ Step 2 – Pour in lukewarm water
This is a step many beginners skip, yet it can significantly improve the flavour of the infusion. First, pour a small amount of lukewarm water (around 40°C) over the leaves. This step, often called “waking up” the yerba mate, allows the leaves to gently absorb water and release their aromas in a more balanced way. As a result, the infusion will be milder, less astringent and more enjoyable.
3️⃣ Step 3 – Add hot water (approx. 70-80°C)
Once the leaves have absorbed the first portion of lukewarm water, you can add hot water. The ideal temperature is 70-80°C. Water that is too hot – especially boiling – can shock the leaves, resulting in the loss of delicate flavour notes and increased bitterness. If you don’t have a thermometer, let the water sit for 3-5 minutes after boiling so it reaches a suitable temperature. This is the range that best extracts caffeine, polyphenols and the characteristic flavour of yerba mate.
4️⃣ Step 4 – Wait a few minutes and enjoy your drink
After pouring hot water over the yerba mate, wait a moment for the infusion to reach its full flavour and effect. Ideally, let it brew for 5-10 minutes – according to scientific findings, around 10 minutes produces the richest extraction of bioactive compounds. This is enough time for the leaves to release their flavour and beneficial properties, but not so long that the brew becomes overly strong or astringent.
If you’re preparing yerba mate in a mug using an infuser or strainer, simply remove it after the brewing time – this will keep the infusion clear and free of leaves. If you’re brewing the leaves directly in the mug, wait a little longer for them to naturally settle at the bottom. After a short rest, the infusion will be much more comfortable to drink.
After all that, you can enjoy your yerba mate at your own pace – without a gourd and bombilla, but fully consciously and properly prepared.
How to drink yerba mate from a mug?
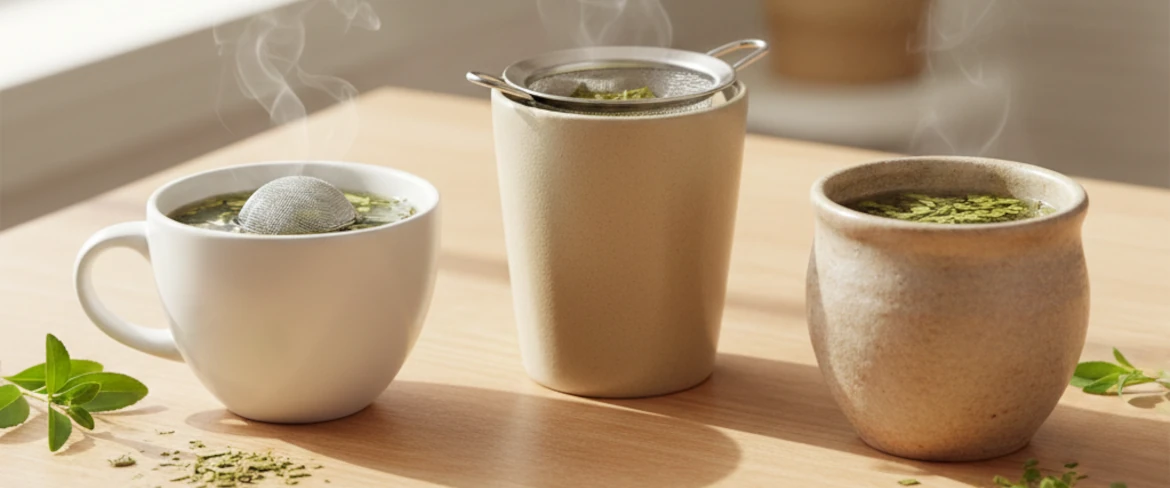
Now it’s time to learn how to drink yerba mate from a regular mug in the most comfortable and enjoyable way. A mug gives you plenty of options – you can use an infuser, a metal strainer, or drink the infusion without any accessories at all. Each method has its advantages, so it’s worth experimenting to see which one suits you best.
Drinking yerba mate with an infuser or strainer
This is the most convenient method for beginners. An infuser or a metal strainer allows you to obtain a clear, leaf-free infusion, so you can drink yerba mate much like a traditional tea. These accessories are especially useful with dusty or finely cut yerba mate blends.
It’s best to choose infusers with dense, fine perforations that can stop even small leaf particles. Good options include:
- metal “capsule‑style” infusers, such as the “Bola” infuser,
- basket‑style stainless steel infusers, such as the “Enorme” infuser,
- strainers placed on top of the mug.
If you want to drink yerba mate comfortably at work or while travelling, this method is ideal. Simply remove the infuser after brewing – and you’re ready!
How to drink yerba mate without an infuser?
Drinking yerba mate without any accessories is also completely possible – and for many people, it becomes their favourite method. All you need to do is allow the leaves to settle at the bottom of the mug after 5-10 minutes of brewing. The infusion becomes clearer and most of the floating particles disappear.
How to drink such a brew? The easiest way is: slowly and in small sips, tilting the mug gently to avoid the layer of leaves. This works particularly well with coarser‑cut yerba mate.
You can also make drinking easier with a few simple tricks:
- ✔️ don’t stir the brew after brewing – leaves will not rise back to the surface once they settle,
- ✔️ leave some space in the mug so the yerba mate can “bloom” properly,
- ✔️ you can hold the leaves back with a spoon while sipping – old‑school, but effective. 😉
How many times can you refill yerba mate in a mug?
Good news: you can refill yerba mate multiple times, even when brewing it in a simple mug. With each subsequent refill, the brew will become milder, but still aromatic.
According to research, every next extraction reduces levels of caffeine and polyphenols – but in practice, this simply means the brew gets gentler. Yerba mate typically offers the most flavour during the first 2-3 refills, though many people enjoy 4 or even 5 pours.
How do you know the yerba mate is “washed out”?
- ❌ the brew becomes very pale and nearly flavourless,
- ❌ the aroma becomes noticeably weaker,
- ❌ the energising effect is minimal.
This is the moment to replace the leaves with fresh ones – especially if you prefer a more intense taste and effect.
📌 Summary:
- Yerba mate in a mug with an infuser or strainer is the easiest option for beginners – clear infusion, zero floating leaves.
- Drinking without accessories works perfectly too – just wait for the leaves to settle and sip slowly.
- You can refill your yerba mate multiple times – usually 2-3 times, sometimes even 4-5 depending on the blend.
- If the brew becomes pale and loses its aroma, it’s a sign the leaves can’t be reused.
Most common mistakes when brewing yerba mate in a mug
Although yerba mate is a very versatile drink and brewing it in a mug is simple, many people sometimes make mistakes that can significantly spoil the flavour of the infusion. Fortunately, all of them are easy to avoid – you just need to know what you might be doing wrong and how to fix it. Below you’ll find the most common mistakes and tips on how to avoid them. This way, you’ll prepare a much tastier yerba mate, even if you’re only just learning how to brew yerba mate in the most effective way.
Using water that is too hot
This is definitely the most common beginner’s mistake. Pouring boiling water over the leaves leads to the loss of delicate aromas and – most importantly – bitterness that can discourage even the most motivated mate drinker. The ideal water temperature is 70-80°C, so always give your water a moment to cool down.
If you’re thinking about switching to the traditional method in the future and wondering whether a ceramic gourd would improve the flavour of your mate, take a look at our blog post: Ceramic mate gourd for yerba mate – why is a ceramic mate cup worth choosing?
Using too much yerba mate
Although yerba mate is associated with strong energy and a bold flavour, adding too much leaf can ruin even the most promising brew. An excessive amount of yerba mate in a mug makes the drink heavy, overpowering and often overly bitter.
How to find the right balance? The safest option is around 10-12 g (2 tablespoons) of yerba mate per 250-300 ml of water – especially important at the beginning of your yerba mate journey. If you want a stronger brew, increase the amount gradually, literally half a teaspoon at a time. This way, you’ll avoid an overwhelming flavour shock.
Brewing yerba mate for too short a time
If the brewing time is too short, the drink ends up watery, flat and almost devoid of character. It may look like yerba mate, but it tastes like… nothing. The optimal brewing time to extract full flavour and effect is 5-10 minutes.
Scientific studies emphasise that around 10 minutes results in the most complete extraction of caffeine and polyphenols – so it’s definitely worth being patient.
📌 Most common mistakes – in short:
- Water that is too hot – boiling water burns the leaves and causes bitterness. Ideal temperature: 70-80°C.
- Using too much yerba mate – excessive leaf gives an overpowering flavour. For beginners, 10-12 g per 250-300 ml mug is optimal.
- Brewing too briefly – yerba mate needs 5-10 minutes to release its flavour and beneficial compounds. Less time = weak infusion.
- Stirring the brew after pouring – this lifts the leaves back to the surface, increases bitterness and makes drinking difficult, especially without an infuser.
- Using very dusty blends without accessories – may make drinking harder; coarser blends are better for beginners.
Avoiding the above mistakes will help ensure that brewing yerba mate in a mug is not only convenient but also delicious. A mug is a great method both for beginners and everyday drinking – and when you feel ready to take it further, you can always reach for a gourd, a bombilla or more advanced yerba mate accessories.
Regardless of the method you choose, one thing is certain: properly brewed yerba mate is a drink that can boost your energy, improve focus and become a pleasant daily ritual. And now – it’s time to choose your favourite blend or replenish your accessories and put everything into practice!
All that’s left is to brew a fragrant mug of yerba mate and enjoy the moment!
❓ FAQ – the most frequently asked questions about how to brew yerba mate in a mug
To finish, we’ve prepared a short section with answers to the questions most commonly asked by people who are just beginning their yerba mate journey. If you’re still wondering how to brew yerba mate in a mug or how to achieve the best flavour – here are simple, practical tips:
1. How long should I brew yerba mate in a mug?
2. What is the best water temperature for yerba mate?
3. How to drink yerba mate from a mug?
- with an infuser – the easiest and cleanest way,
- with a strainer placed on the mug,
- without accessories – simply wait for the leaves to settle at the bottom and sip slowly.
4. How much yerba mate should I put in a mug?
5. Can I refill yerba mate brewed in a mug?
6. Is brewing yerba mate in a mug different from brewing it in a gourd?
Sources of information:
- Wikipedia: Mate (drink).
- C. I. Heck, E. G. de Mejia, Yerba Mate Tea (Ilex paraguariensis): a comprehensive review on chemistry, health implications, and technological considerations, Journal of Food Science, 2007.
- R. Gan et al., Caffeoylquinic acid profiling: comparative analysis in yerba mate, Indian camphorweed, and stevia extracts with emphasis on the influence of brewing conditions and cold storage in yerba mate infusion, Nutrients, 2018.
- G. Khaksar et al., Health Benefits of Bioactive Compounds from the Genus Ilex, a Source of Traditional Caffeinated Beverages, PeerJ, 2024.
Recommended

Yerba Mate Set 10x50g Calabash + Bombilla

Yerba Mate Yaguar Coconut Starter Set 500g
